Interior Continued – Cedar Ceiling

Not that the wall panels are in, we can start working on the ceiling. Yes normally the ceiling would go in first, but we were thinking about what to use and I figured on a trim piece in the corners anyway.

My wife thought using the birch ply on the ceiling would make for far too much of the same material, I was skeptical, but she was absolutely right. I love how the ceiling turned out.

We used tongue and groove cedar boards, it’s about 1/4″ thick and very light weight. It smells AMAZING. Just like the sides, it gets a dab of constriction adhesive and gets micro pin nailed in place.

Starting on the front wall.

It was hard to not get joints staggered, there are only so many options on where to break the boards, ribs are every 24″ in the ceiling.

Fitting the lights

It was much slower work with each piece going on individually, having to cut each piece to fit, cut out the light holes and all that, but it came out wonderfully.

The lights we are using are 3W warm white LED’s there are 10 of them, I switched them in banks. The ones over the “hall” consist of one above the door, and two in the walkway between the kitchen and dinette, those are on one switch. The “work” bank is two over the kitchen counter, and two over the dinette. The one over each bed, and one in the bathroom. It kinda made for a lot of switches and wires…. I was worried they would not be bright enough, but its plenty of light. These are the lights, I am really happy with them after a couple years now. Great color and plenty of light. Amazon Link

Most of the way done, I added some spray foam around the fan holes, just to keep cold air from moving under the ceiling, there is a little gap between the insulation and the boards. You can see my temporary lighting solution.

Almost done

And all the ceiling boards on!

Ready to sand

I used a clear polyurethane on the ceiling. I had to sand it before application, the cedar had a fair bit of sap droplets to sand off, and it will make the finish much more even. After a quick sand my shoulders were killing me. The ceiling is about 7’6 ish and man that was hard overhead work. But I then broke out a rag and started to get finish on it. Three coats are recommended, I did one, I just couldn’t keep my arms up there any more. It’s not going to be a wear surface.

Finish bringing the color out
All finished!
Pretty

It came out so much better than I could have expected. Really glad we used this on the ceiling.

With the finish on, I could pop the LED lights in and see if it was enough light! I had only hooked one to a battery to test ( I had to order multiple packs so I ordered one first to try out), luckily they were nice a bright.

I used self adhesive heat shrink crimp connectors for all the connections. They are lovely, waterproof, vibration resistant, and pretty easy to use. A heat gun is definitely a big help, they take a lot more heat than you would think to melt and shrink.

Electrical connectors

The lights pop in with spring clips and fit the holes nicely. My electrical plan that looked good on paper is a little weird looking…. Oh well.

They look nice and subtle
They work!

Tested the light by simply hooking them to my battery charger, they work and light up the space well! They look pretty nice too. The warm white is so much nicer than most “industrial” bright white that LED’s come in.
The start of the Interior

Now that its insulated we can start building the interior! Its been a lot of work to get here, but there is so much more to go.

For the interior walls we are using a 1/4″ plywood, its prefinished birch. Reasonably cheap, just cut and install, not finishing needed. Its not the lightest, but works well. To install I used more construction adhesive (i think there are 9 quart tubes behind the walls and ceiling!) and micro pin nails. I’m happily surprised the nails hold really well.

First panel up!

I started with the easy square one…. Good practice anyway! I will come back and cut the windows from the outside with a router, this way the inside and outside holes match perfectly.

Second panel

All these were cut with my old skill saw and a jog saw. Nothing fancy. I did my best to break the panels on windows, that way there were no seams running right net to them.

Curve around the door
Sides done.

With the sides done we can install the windows. Ran into some issues here. I should have used a wood strip around the windows, not just the foam, this would have kept the correct wall thickness. I ended up having to shim the interior plywood out to make the walls the required 2″ for the windows to clamp too.

Lots of glue an shims to make it right

But with the windows in we are starting to get somewhere!

Inside of the windows. clamp rings screwed on
Outside liberally coated with goop

Windows were a big step. Tons more light and feels way more open. Ceiling goes in next.
I made a quick time lapse of the weekends work. There are some previews of what’s to com in the next post as well.


Furring in the walls and Insulation

The walls are bare aluminum, there is a rib every 12″ that is one inch deep. We need a couple things here, 1″ is not enough insulation, we camp in sub freezing a lot and more is better. Also we need something to attach the inner skin of the wall to.  Also a vapor barrier is needed to keep the wall cavities dry and to keep the mold out.

So to do this, I cut strips of 3/4″ plywood down to screw and glue to each of the aluminum ribs.

Wall structure

This will give us 1 3/4″ of insulation, we are using polyiso spray foam, its R6.6 per inch, that will give us about R11.5 in the walls. The spray foam is also a very good vapor barrier, so we get a bonus there too.

The strips were glued on with construction adhesive and self tapping screws every 12″. They are quite solid. 1/4″ plywood is going to be used for the interior skin.

Furring strips on he walls.

The ceiling (which apparently I didn’t take any pics of, will get 4″ of foam. I used 1/2″ plywood and 2″ foam board strips to furr it down. The ribs on the ceiling are much larger.

Getting ready for insulation, you can see the ceiling furring here.

Everything you don’t want covered with foam gets covered, all the wires get taped down, and attached wherever possible. If not the foam can get behind them and push them off the wall. it goes on as nearly a liquid and expands as it cures.

I looked at doing a DIY spray foam kit, I have used them in the past, but this is large enough I would have needed two kits, its messy and just an all around pain. I decided to hire an insulation contractor to spray it. Money well spent IMO. If you do use the DIY kits, find and old cooler that the tanks fit in, and fill ti with very hot water, they work best when the tanks are above 70 ish degrees.

Lots to do before the insulation guys show up….

Getting ready for insulation was a lot more work than I expected…. Everything that goes inside the walls has to be in place. Once the foam is in there is no changing or adding things. I had a big list.

Insulation starting!

The insulation guys showed up! They set up fans to ventilate and got to spraying. The two part foam expands and cures in place after its sprayed. Its closed cell, wont absorb moisture, and adds a lot of structure back to the truck, it glues itself on very very well….

Once they are done spraying, it looks like a very messy frosting job on a cake, then the dirty part starts, they grind it all back down flush to the furring strips we added. Two guys with grinders makes a lot of foam dust and chunks.

All insulated
After Grinding Smooth

After grinding it smooth they came back to make sure no spots were too thin and nothing got missed. It immediately made it not sound hollow inside any more. I need to come back later and insulate under the floor. Its something I will do myself later on.

We ended up with R 11.5 in the walls and about R 28 in the ceiling. Its nicely insulated.

More big holes, its time for Windows and Doors

Now that the truck and box are connected its time to make it feel more like a livable space, I need windows! The windows were ordered from Motion windows. They will make any size or shape you need. I ordered all of them double pane, this was the big one for me. A bit of insulation value and they don’t fog/drip quite as much. They all also open, and have screens, which should help a bit as we don’t have any AC.

I started with the Door, it was an ebay special, lots available there, but the UPS guys definitely had their way with it. It will still work, just some dents around the edges.

Hole was cut with a skill saw on the straight parts and a jig saw for the curves.

Door hole!

Door was installed with polyurethane caulk and stainless screws. Gives some scale to the truck. That is an 8 foot ladder…..

Door installed

That was the easy one, now onto windows. The windows have a 3″ corner radius, I used a 6″ hole saw to make the four corners, then connected the holes with a skill saw for the straight lines. They are sandwiched together with the inside panels, so I can only temporarily install then before the inside is done.


Four holes for the corners
Connect the dots
Big window hole.
Taped in place.

The tape keeps the window in place and the water mostly out. There is one big window where the dinette is, one in the kitchen, and one above the bed. Hopefully that’s enough venting. I wanted as much natural light as possible, but had to balance cabinet/storage space as well.

A preview, and two windows

Two windows you can see here, and a little preview of the next chapter, furring the walls and ceiling in.

Window replacements and cab seals.

We left off with a big new hole in the truck. Plastic works to cover it, but not exactly what we are going for.

So A gasket was ordered, its a rubber accordion shaped seal, its made to slip over a lip on either side. e left a lip around the hole in the box, that as easy, but we need to fill in the holes where the window was, and shape a lip around the back of the cab.

A little CAD (cardboard aided design) and we have templates for the window. I used the piece of the back wall cut out of the box, it has ribs in it take make for nice strong panels and was just big enough.

Ready to cut

They were cut using a jig saw and skill saw, then trail fit many many times, a little grinder work each time and finally they fit in place nicely. Some sealant and a few bolts hold them in place.

Just imagine the same thing on the other side.

Now we need to finish cutting the hole, if you remember I left the bottom not done. This took some serious doing, I went trough four carbide tipped blades trying to cut that Little bit off.

Once that is cut and the window panels are in place we can start to fit the gasket. The gasket is from Uni Grip, they makes lots of different ones. Its made for a nice straight flange, I have the back of a cab wall, not straight or the right size.

The seal was glued in place with polyurethane caulk, after hammering it onto the lip all the way around it seems to fit well! We have a connected box and truck!

Gluing the ends of the seal
Connected!

Next up is more holes for doors and windows.

Holes! Cutting holes in a new truck.

Cutting holes in a new truck is SCARY. But it needs to be done. One of the design requirements my wife and I had was being able to get between the cab and box without going outside. That means a big hole.

I started by striping the interior out of the back of the truck. This allowed access to the back wall and moving the headliner forward. Seats out, trim pieces out, seatbelts out, there are a lot of pieces in a new truck.

Getting close to naked
Headliner had to be dropped and moved forward

Once all that is out of the way, there is a lot of measuring this and that, thinking, staring at it, cutting holes cant be undone. We decided on a 3′ wide opening as tall as we could make it. Its offset to the drivers side a couple inches to allow a little more room for the passenger rear seat. Once the plan was finally in place, we drilled two holes in the bottom through both the truck and the box, this gave us the bottom corners.  More measuring to make sure everything fit and its cutting time.

No going back now

Starting from the box side I cut a big hole…. No going back now. A skill saw goes though the aluminum box easily. The floor not so much, its steel and really hard.

Once the hole was cut there it was on to the truck. I started by removing the window. I spent WAY too much time trying to get it out in one piece, I was doing great, it was loose all the way across the bottom and I only had about 8″ left to go on the top, when yeah it broke. Out comes the shop vac to clean up a lot of glass.

Window out

With the window out there was more thinking and tape measure work, and head scratching. Everything needs to line up on both sides. Get on with it, out comes the sawzall and I significantly drop the value of my new truck. But we have a hole! And it even lines up pretty damn well on both sides. The bottom lip will have to get attacked with different tools, its really hard and needs to get cut close to the floor.

Sawzall time

Up next, closing up the big new hole.

Water Leaks, and Wiring, its a Build!

Now that the roof is sealed up, I seem to have other places of water ingress….. The marker lights and something in the corners by the cab.

Marker lights, easy fix
Hmmmm No idea on this one

Marker lights are easy, but I don’t really know where the other water is coming in.  A coat of sealant on the lights and we move on. Corners will have to be dealt with later.

On to forward progress, wiring design! This was kind of critical, once the insulation is in there is no changing it. I spent quite a bit of time thinking on electrical. I settled on batteries under the bed, I wanted to try to keep them a little warm as that was an issue in our old truck. We are using four 250Ah 6V AGM batteries, this should provide us with 250 usable amp hours at 12v.

So the forward edge under the bed became the main electrical hub. I needed to run both wiring for 12v, and 120V. We will have a few things that need 120V, coffee maker, microwave, and a plug if laptops etc need to be charged. This will be feed by an inverter or generator/plug in.

I decided on 12/3 wire for the 120v, enough for 20 amp circuits, and 12/2 wire for the 12V, this should keep voltage drop to a minimum. I did run a couple of larger circuits as well, one for the fridge and one for the heater and water pump. The 12v is tinned marine wire, the 120v is stranded copper, it was cheaper just to buy an extension cord than I could buy the wire by the foot.

The first of many deliveries…..

Wiring begun, it was all strung overhead to keep it out of the elements. I am trying to keep as much as possible above the floor.

Main battery area under the bed

The wiring went fairly quick but it took miles of wire. I used an entire 300′ roll of the 12V wiring, and had to run a different wire for all the lights. The other main connection area will be in the kitchen cabinets, the switches will be located here, just inside the door.

Overhead mess!
Passenger side has the main switch area.

That is the bulk of the wiring, a few more circuits here and there, but that’s most of it. Next is furring out the walls and cutting the pass through!

Whistler, Zip Lines and getting Dumped on!

Well the truck cant take all our time, so we headed up to Whislter BC for a quick trip.

Skiing was epic! This is generally crappy snow season, they got something like 34″ while we were there. Totally unexpected, I almost didn’t bring the pow skis!

This slideshow requires JavaScript.

There is something to be said about skiing and not seeing your boots all day.

We also took a zip line tour with Super Fly while we were there. Something non of us had really ever done. It was awesome! They take you up the mountain in a tracked UTV, then you go on four different zip lines that crisscross the valley to get back down to the bottom. Really really cool.

This slideshow requires JavaScript.

I mean what skier can complain about waking up to this!?

All in all a great little trip!


Make a Plan

Now that the truck is home, its time for a plan. I measured the truck and made another revision to the plan. It looks like it should work.

The cabover will be a bed for our daughter, and a cabinet on the passenger side. There will be a small dinette on the drivers side, a crawl through to the cab in the middle and the kitchen on the passenger side. The back will have ski storage accessible from the outside, and a bathroom and bed for us in the back corner.

Cad Revision #4 I think….

The truck arrived as a box truck, one light in the center, some plywood on the walls and some tie down tracks. Not very RV like.

Notice the trash can? Yeah the roof had a bog hole, well a piece of plywood covering a big hole, it leaked, a lot. That became the first order of business. We had decided not to do a roof top AC unit, the truck is already about 12′ tall, adding more height didn’t work for us.  So for ventilation we decided on two MaxxFans. This gives us one above the kitchen to help with cooking venting, and one over the bed. They can both blow in or out, hopefully this works!

Fans ordered and arrived, time to find a dry day to install.

No Wonder it Leaked
Fan on, Much Better
Fan on, Much Better

Next order of business is to strip the walls down, and strip the back of the cab so I can cut the pass through in!

The Begining

Where to start, we got into this mess when we looked at renting an RV to go ski bumming in.  As I am sure many of you have found out, renting an RV is extraordinarily expensive! So Instead we purchased out own! We both volunteered with the local Search and Rescue group when we were younger and just happened across the old communications van on CL. It was a 4×4 converted small Winnebago.


Aptly named “the Beast”, it was loud, it was bouncy and it was awesome. We took it skiing all over BC, WA, OR, ID and MT. We had so many good times in that truck, but it was big, it had some water issues when we got it that we had band aided to keep it alive, and it was time to move on.

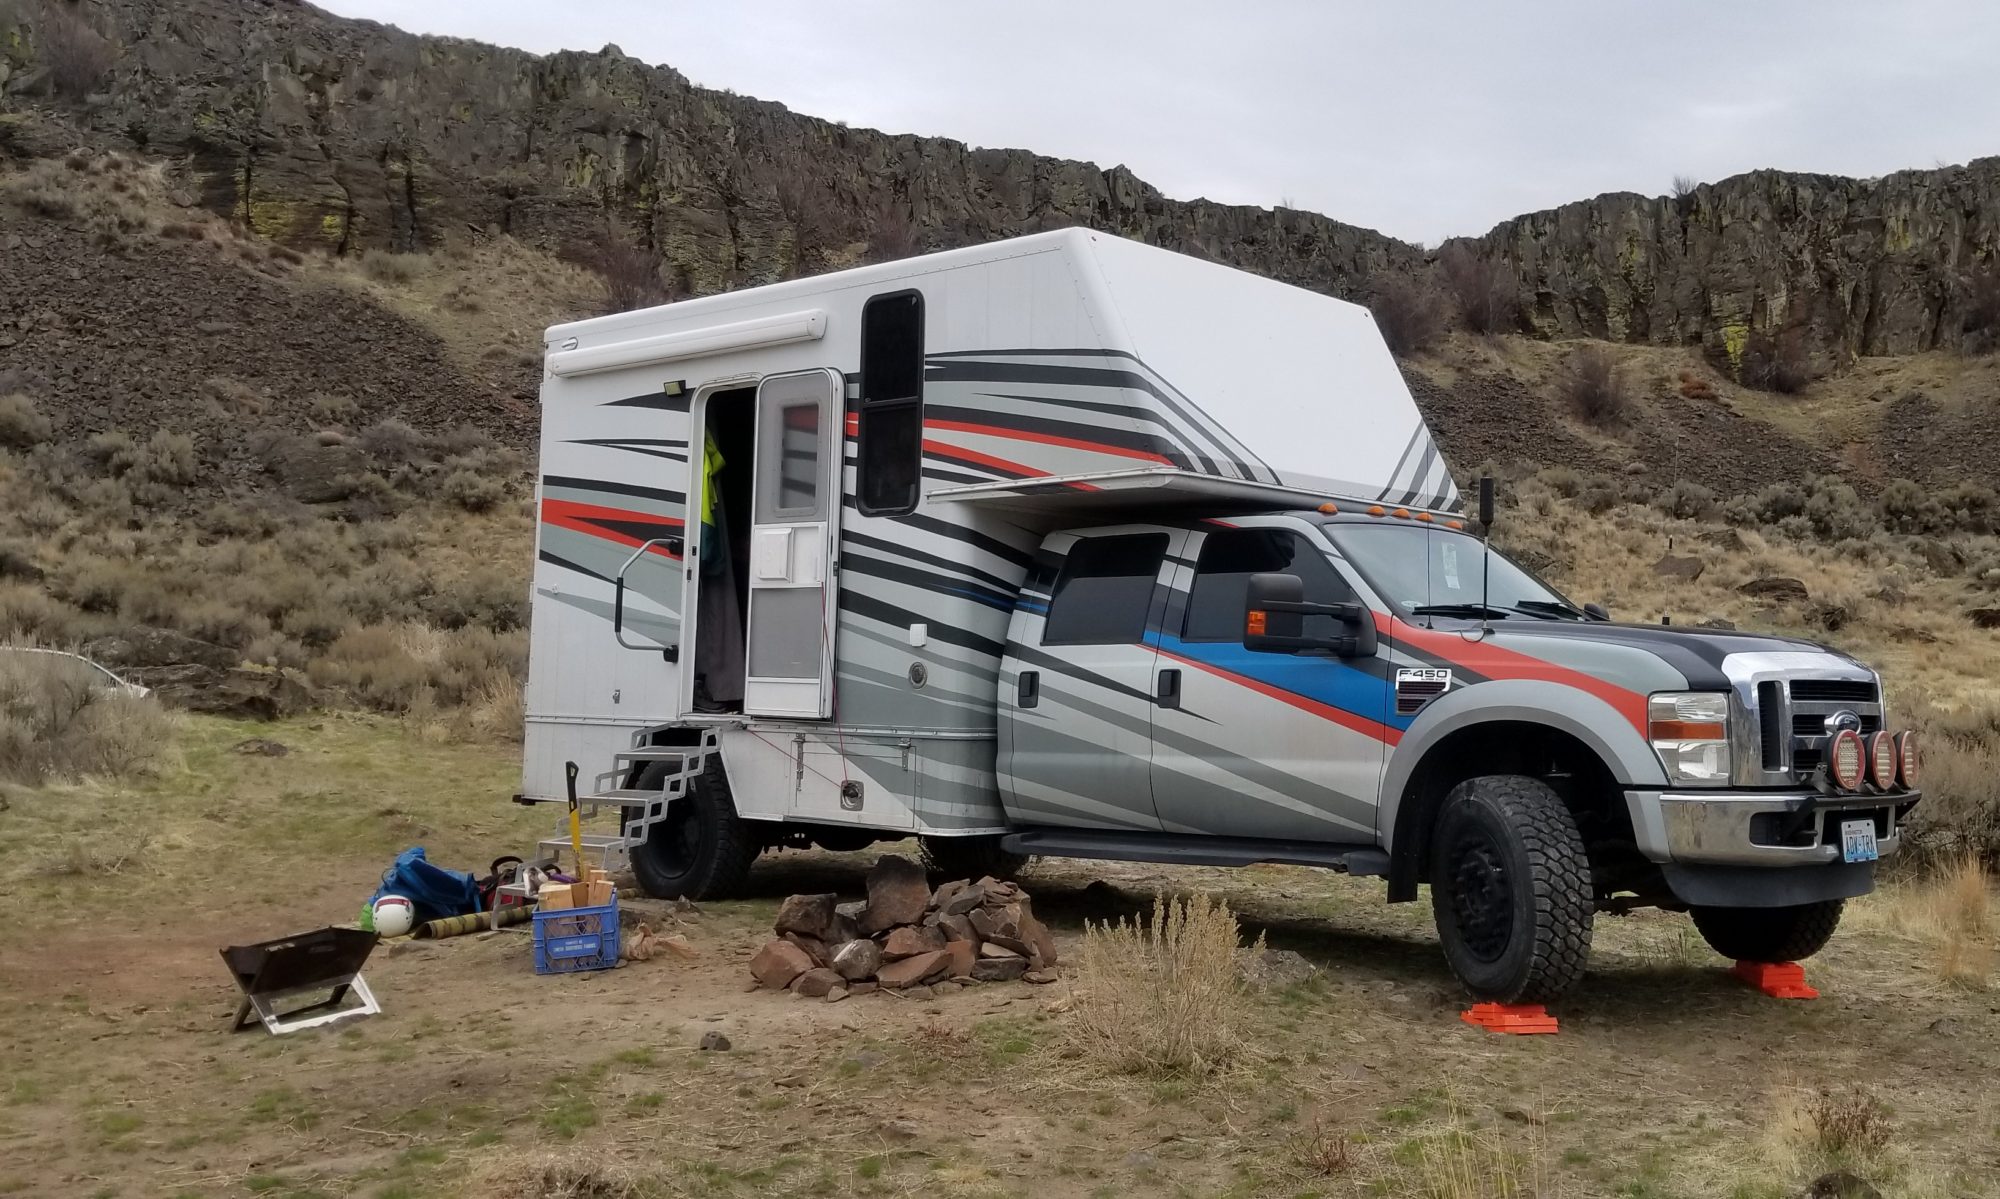
I had half heatedly been looking at cab chassis trucks, to build a replacement on. I was looking F450 and 550’s mostly as they are the most common “medium” duty trucks, lots of fleet trucks available. I had made drawings of a layout using a cab over and a 13′ floor, and a box built by a local company, but it was almost prohibitively expensive.

That is when I happened across an add for this, out new truck, on CL. I was searching under some obscure title for box truck when it popped up.

It was nearly perfect, we needed a crew cab, our daughter has gotten big enough to not need a car seat which made us not feel so good about her sitting at the dinette in the old truck. It had a body from the same company I was looking at getting one done at, but it didn’t have a pass thorough. It was also a foot shorter than I had designed, I redrew the plans and it seemed to still work, just a little tighter. It seemed to run well and had a newer motor put in it at some point. The deal was struck and it was brought home.

Parking just got tight

Now the real work begins. We need to sell the old truck, and get the new one usable as fast as possible!

Next Installment: Make a Plan